ms-dp100 self-learning course: module 1.1
originally created on 2025-07-12
updated on 2025-07-12
tags: [ms-dp100-series, series]
- - -
this is my overview/notes for the first module of the microsoft dp-100 self-learning course! i hope you find this helpful :)
not too shabby - i should know most of this stuff already since ive worked with it before (source)
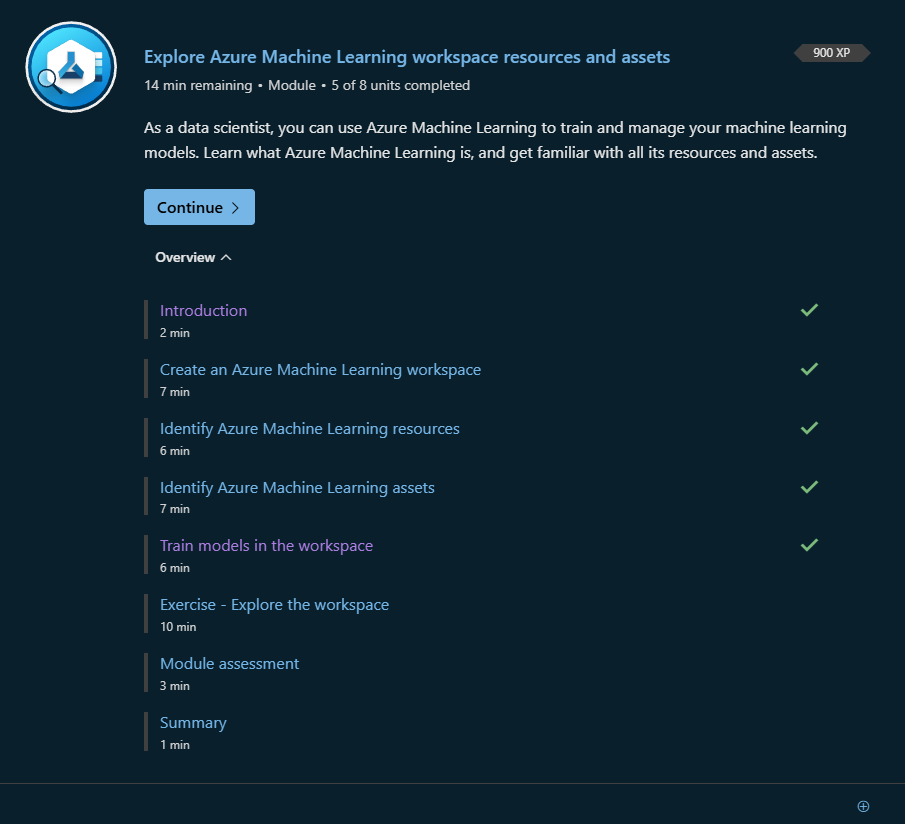
submodules 1-2 - intro
the first two submodules detail what is in a machine learning service (the workspace) as well as how to create one. in order to make one, you need to:
- get access to an azure account and subscription (as you do with most cloud services)
- create a resource group (aka a container to organize an azure "solution")
- create a machine learning workspace (the actual service - "workspace" and "service" seem to be used interchangeably)
there are multiple ways to do the last step as well, those methods being:
- using the azure portal (yay, fancy ui)
- using the azure command line interface (cli)
- using the python sdk
i tried to create a workspace using the azure portal, and it was pretty straightforward. in the future, i would like to try using the sdk. clis are usually not my thing, and i prefer using either the portal of the sdk for the time being. they provided some nice code snippets though!
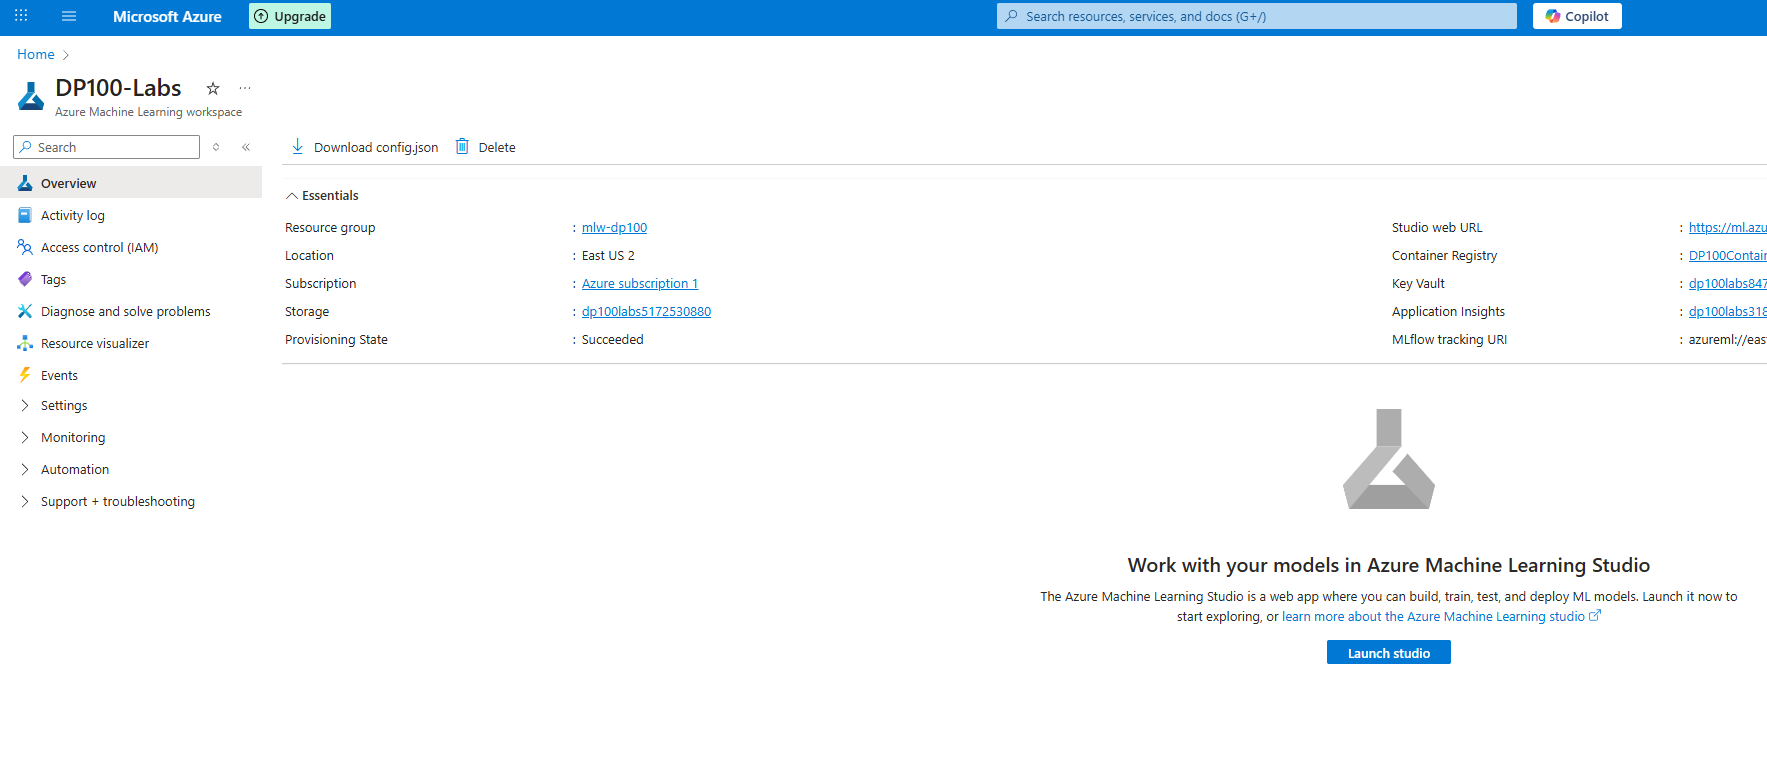
i created a workspace! yay!
the second submodule in particular goes over the automatically created resources in the workspace. these resources include:
- azure storage account - used to store files/notebooks and job/model metadata
- azure key vault - used to store secrets (like api keys, passwords, etc)
- application insights - to monitor applications and services
- azure container registry - used to store images for the workspace
azure uses role-based access control (rbac), meaning that you can assign roles to users/groups to control what they can do. the docs give three general examples of roles (owner, contributor and reader), and there are two others that are specific for a machine learning workspace (azureml data scientist and azureml compute operator). however, there are a bunch of other roles that can be seen in the actual iam screen. custom roles can also be created.

wow, theres a lot of options...
tangent: azure rbac (skip)
azure rbac works in a similar fashion to most abstract rbac systems.
however, as with most of these systems, there is a lot of beurocracy and
fine-grained control. i can see why this is useful for large organizations,
but as someone who is used to small teams, i would find this to be a bit
overwhelming.
essentially, roles are defined using a few general fields.
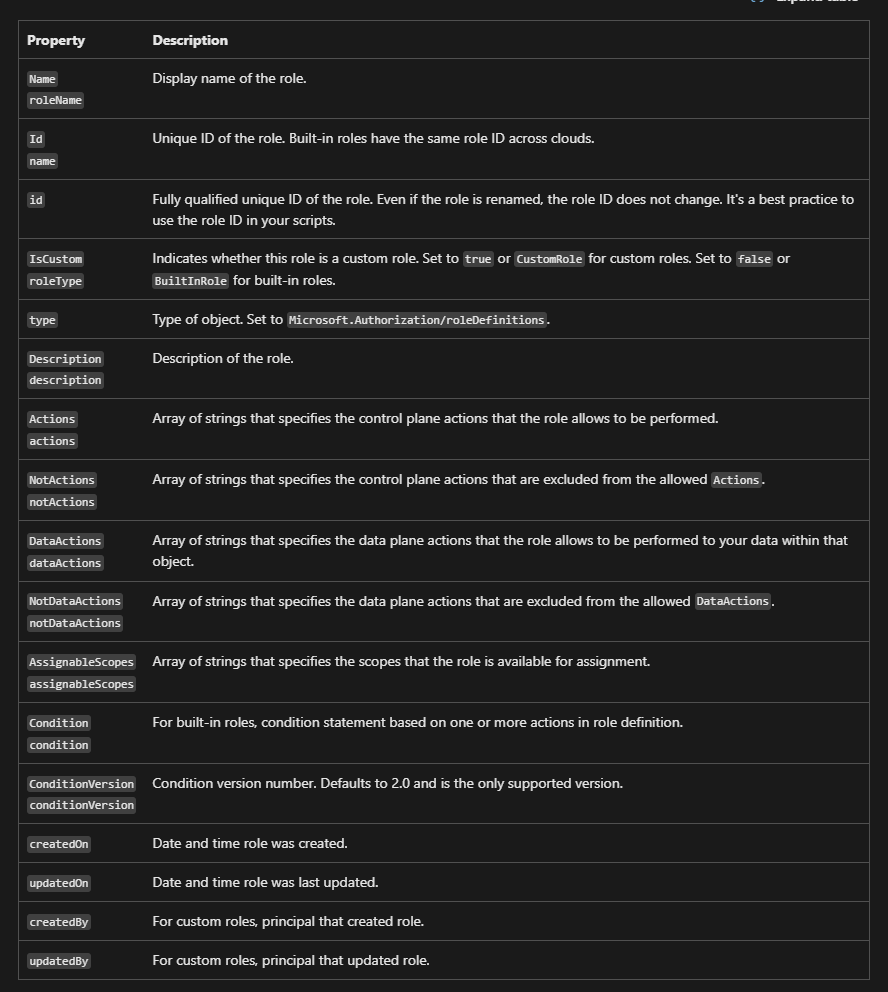
a lot of role defintion properties... (source)
there are a few scopes that can be defined for a role as well. below is an image that shows this!
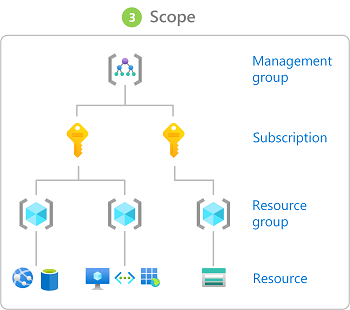
the four scope levels (source)
azure rbac is an additive model. if you have multiple roles,
you will have the union (sum) of all the permissions of those roles.
azure rbac is also stored globally to "ensure that customers can timely
access resources regardless from where they're accessing" (source).
in fact, i seem to be citing the rbac overview a lot. here is just
a link to the page itself: rbac overview.
tangent over
azure has a machine learning studio which is a web-based interface for managing machine learning resources. at a first glance, it looks somewhat self-explanatory.
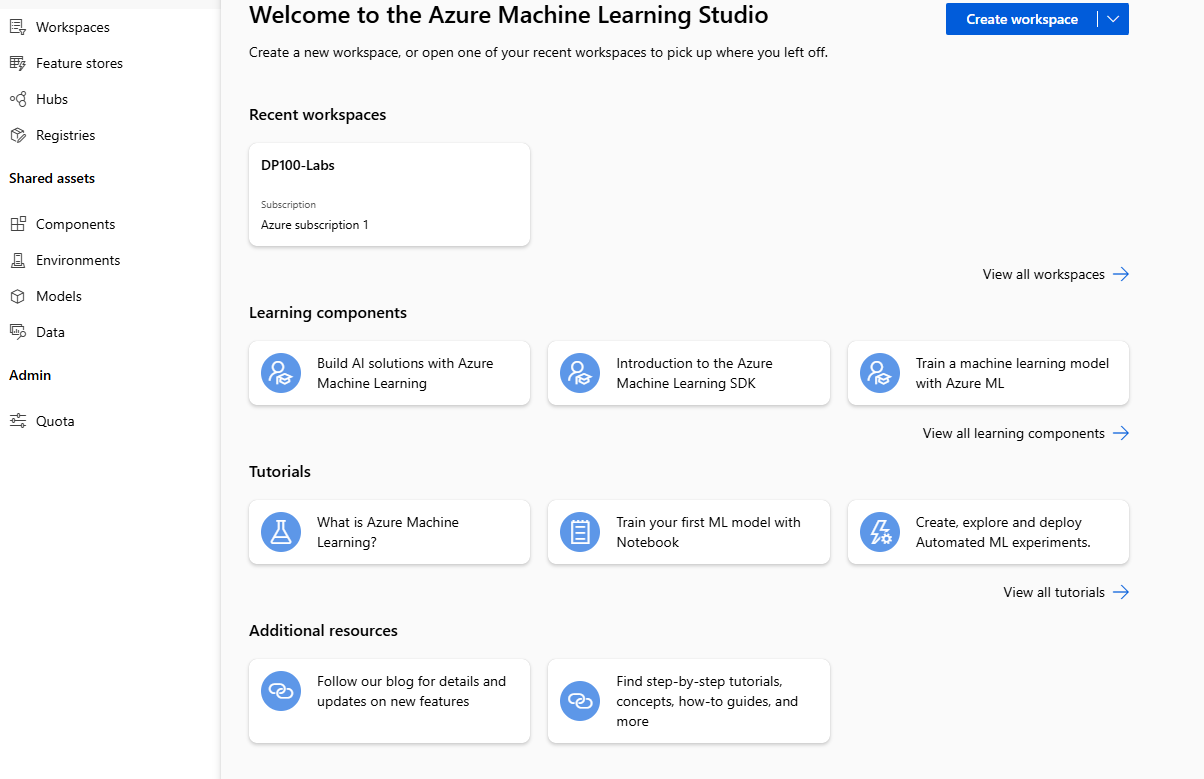
azure machine learning studio
azure also offers a tutorial on how to organize multiple workspaces in an enterprise setting. that's very useful! i havent read it, but i definitely should in the future.
submodule 3 - resources
this submodule goes over azure machine learning resources ("the infrastructure
you need to run a machine learning workflow").
the workspace itself is a resource, and the other two resources
are compute resoucres and data storage resources.
the workspace is just...the workspace. you use the workspace to train/track/deploy models.
this is also where logs and snapshots reside.
compute resources a bit more nuanced. apparently there are five types of compute resources.
- compute instance - basically a virtual machine.
- compute clusters - clusters of cpus and gpus. usually used in production workloads because they are scalable
- kubernetes clusters - azure kubernetes service (aks) clusters. basically kubernetes, but on azure...
- attached computes - other azure compute resources external to the workspace
- serverless compute - used for training jobs, just a compute resource. no server.
these compute resources are usually the most expensive part of the workspace. after all, processing costs money.
finally, data storage resources. so, the workspace actually doesnt
store data - it uses datastores.
datastores use azure's data services. the workspace just makes connections
to these datastores. the connection information is stored in the key vault (mentioned earlier).
there are four default datastores that are created when the workspace is created:
- workspaceartifactstore - stores compute/experiment logs
- workspaceworkingdirectory - stores files from compute instances (usually used by notebooks)
- workspaceblobstore - default datastore, used for unstructured data
- workspacefilestore - connects azure storage account to workspace
of course, you can create your own datastores.
i started looking around to see if i could find the datastores in the azure portal.
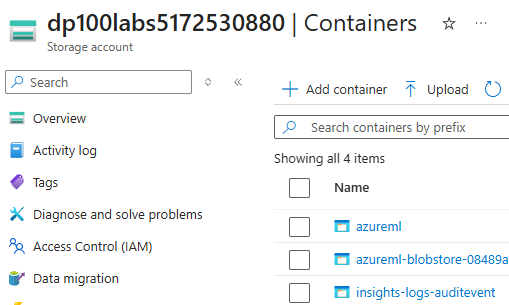
found the blobstore!
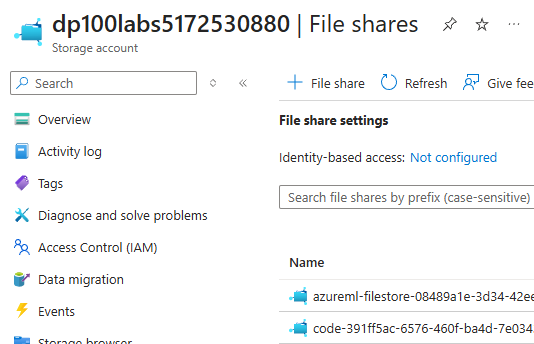
found the filestore!
these were both found in the "data storage" tab on the portal.
it makes sense that i couldnt find the other two, as i had not done anything with compute yet.
submodule 1.4 - assets
this submodule goes over assets.
assets can be a bunch of things.
- models
- environments (like conda?)
- data
- components (resusable code?)
azure goes over some ways to log workflow artifacts like checkpoints and metrics.
personally, i have beef with this. it advertises a .pkl format, but...this
is not safe. use safetensors!!!
azure has built-in versioning for the creation of models. that's pretty nice,
since it's very easy to forget when you made what model and which ones are good.
then they say something about environments and how they are used so that
your code can run on any compute...same reason why we have venvs and docker. yea.
azure environments are stored as images in the container registry (mentioned earlier).
thankfully, azure makes it easy to select an environment when creating a job. that's sick.
data assets - in this context - refer to a file or folder.
they also have version control.
components are also used in jobs. they represent reusable code, and they are
particularly strong in pipelines (i.e. normalizing data, regression, k-fold validation, etc.).
now, we get to the juicy stuff.
submodule 5 - training models
this submodule goes through an example of training a model. it cites
the first github lab (see repo from megablog) as an example.
there are three cited ways to train a model:
- automated machine learning (automl)
- jupyter notebooks
- running a script (as a job)
(note: i spent so long trying to figure out what a job was. man.)
tangent: automl (skip)
when did this become a thing????
automl does not use code. how in the world?? according
to the
docs,
automl only requires a few steps:
- identify ml problem (clasification, regression, nlp, etc.)
- choose whether you want to code or not???
- select labeled training data
- configure hyperparameters and preprocessing
- just let it do its thing
what??? like...it does seem like it only works with supervised learning, but that's insane. way to get rid of my job. i mean...surely, it isn't perfect, but it has so many functions like feature engineering and ensemble models. one day, we'll have models to train models. insane.
tangent over
at this point, i tried to clone the repo into the workspace (the second way).
in order to do this, i needed a terminal.
in order to do that, i had to create a compute instance.
for now, i just created a cpu instance (i dont want to pay that much...).
the process was pretty straightforward!
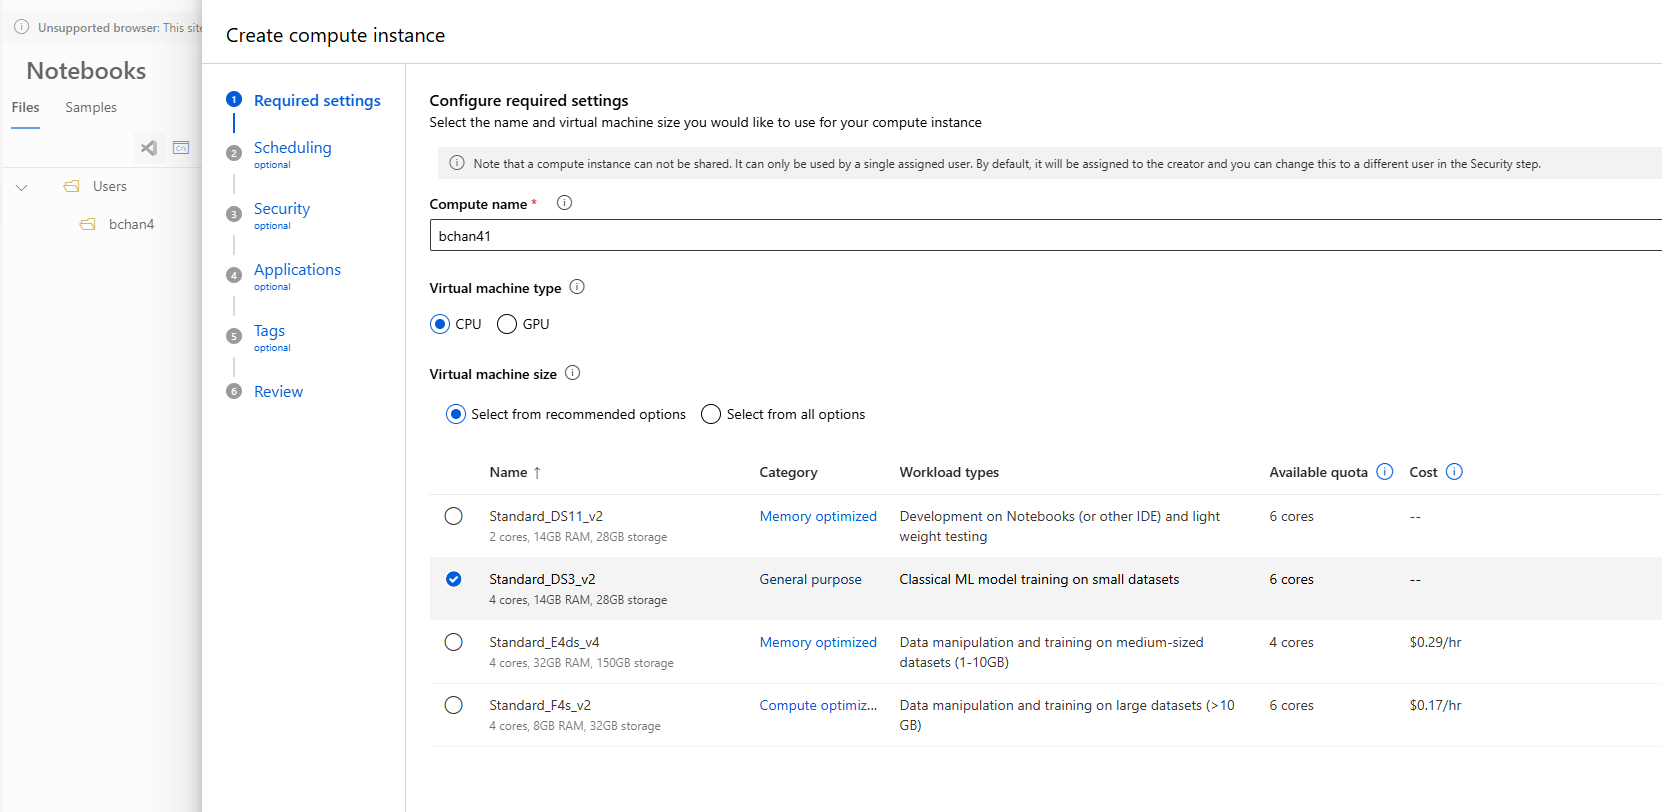
creating a cpu compute instance
they gave a few optional settings like idle shutdown (which i set to 60 minutes),
security, a startup script and tags.
after this, it took a bit for the compute to start.
it turns out that the github repo that i was trying to clone
(which was in the other repo that i linked in the megablog) did not publicly exist.
darn. thankfully, the next submodule covered this.
i want to extend a bit on the third option: running a script as a job. this is
because it is specialized to azure.
jobs can be used to automate script execution, and there are three types of jobs
that are specified in the course:
- command - used to execute a script
- sweep - hyperparameter tuning when executing a script
- pipline - a sequence of multiple scrips/jobs in order
submodule 1.6 - exploration
this submodule just gave a practical example of how to make a training job.
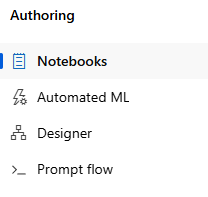
authoring options - all options are present from submodule 5!
the tutorial asked me to go through the automated machine learning setup, so i did! this is what the confirmation page for data looked like:
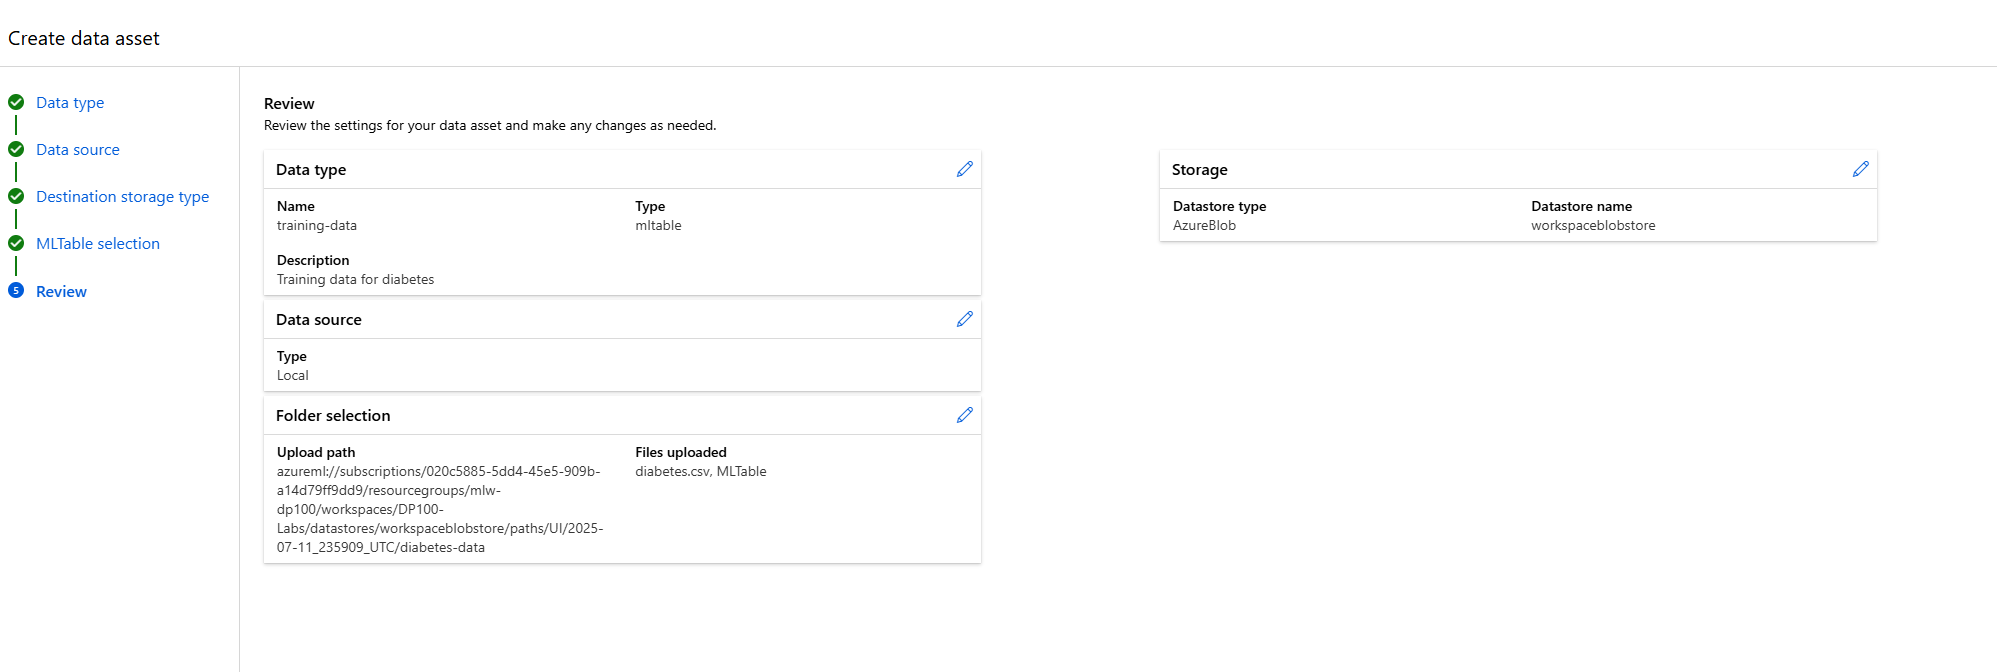
automl data insertion confirmation.
the task settings detailed the labelled data, the classification-specific settings
(since we are doing classification) and various limit settings
(i.e. experiment timeout, iteration timeout, max trials). it also
allowed me to decide the train-testing split (i did 90/10).
i set up my compute instance for the job, and then it took me to the review page.
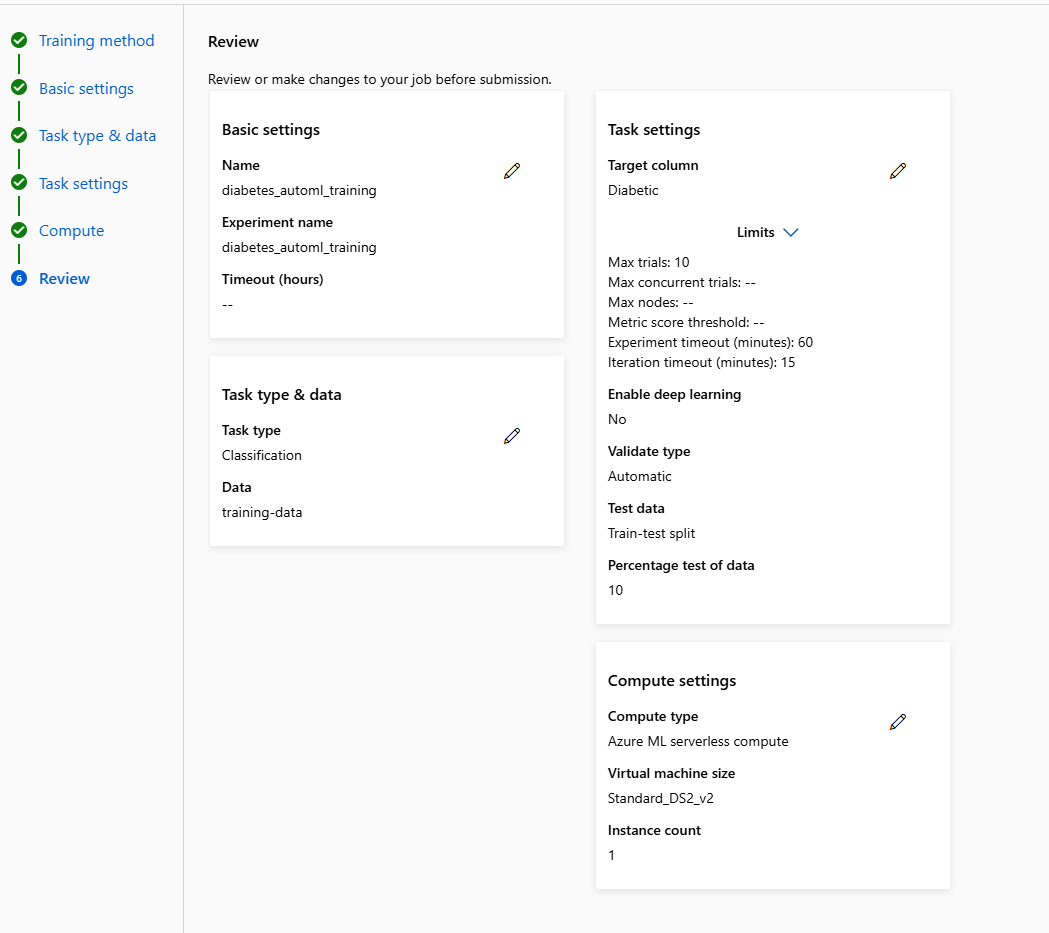
automl confirmation page for the job
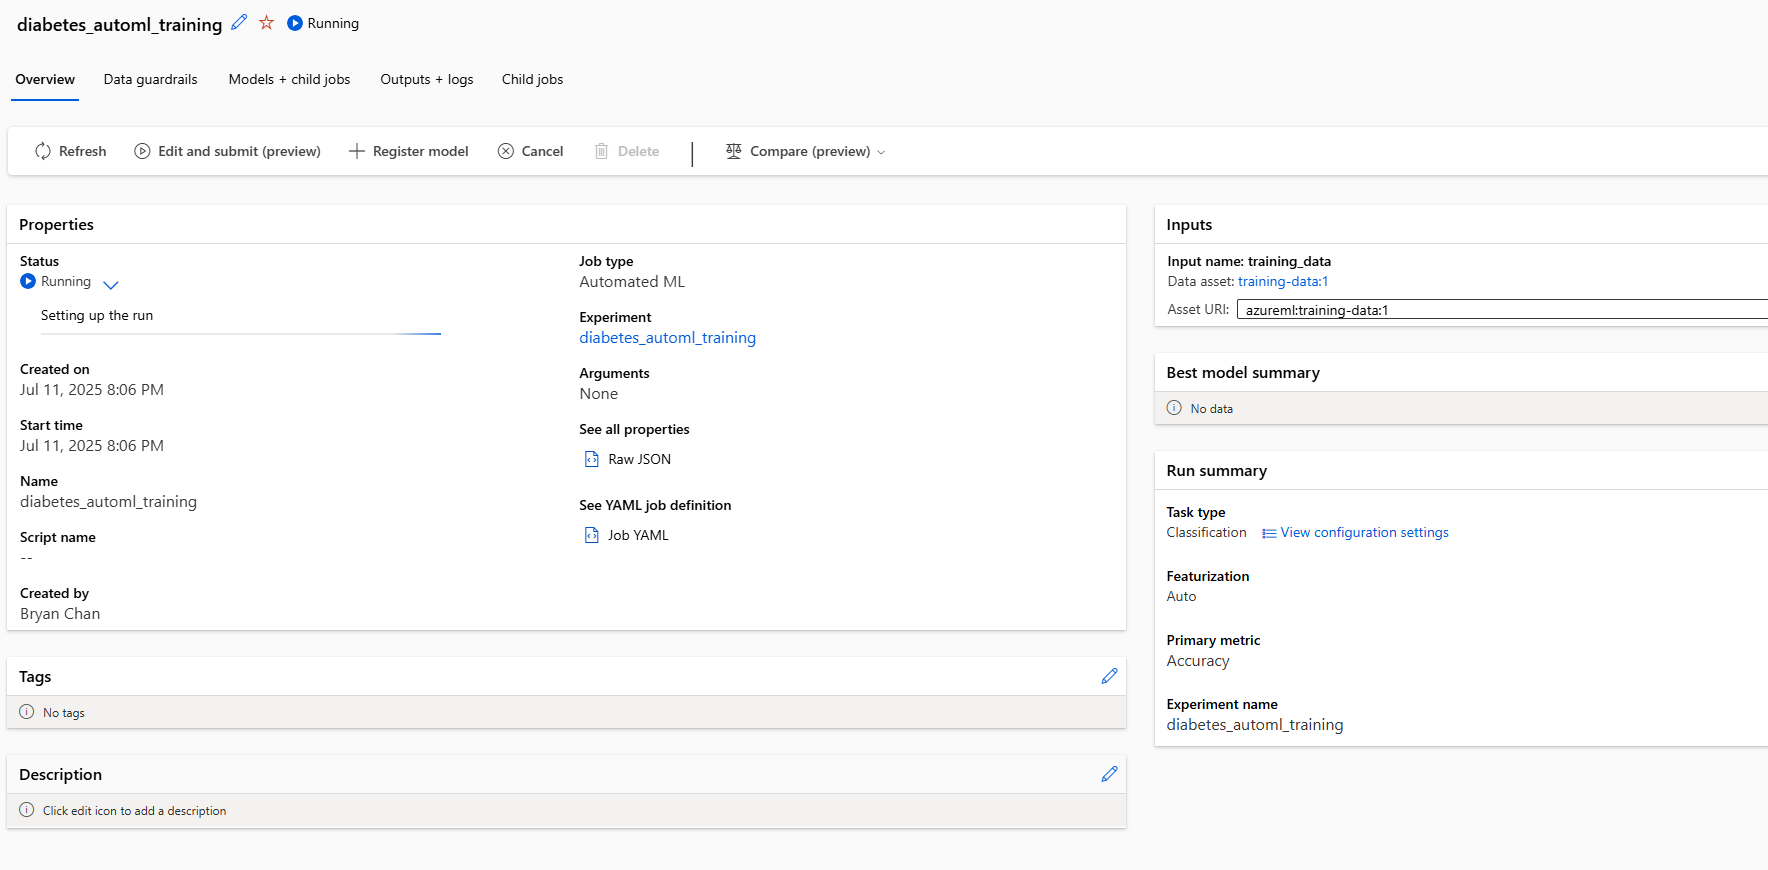
the job is starting!!!
the job took approximately 10 minutes to complete. there was a child job
that was spawned (probably for automation purposes?). a few other
miscellaneous jobs were spawned as well in the experiment.
there were some pretty nice guardrails in the job that were automatically set up.
this included class balancing, missing feature handling, high cardinality feature detection
and validation split handling.
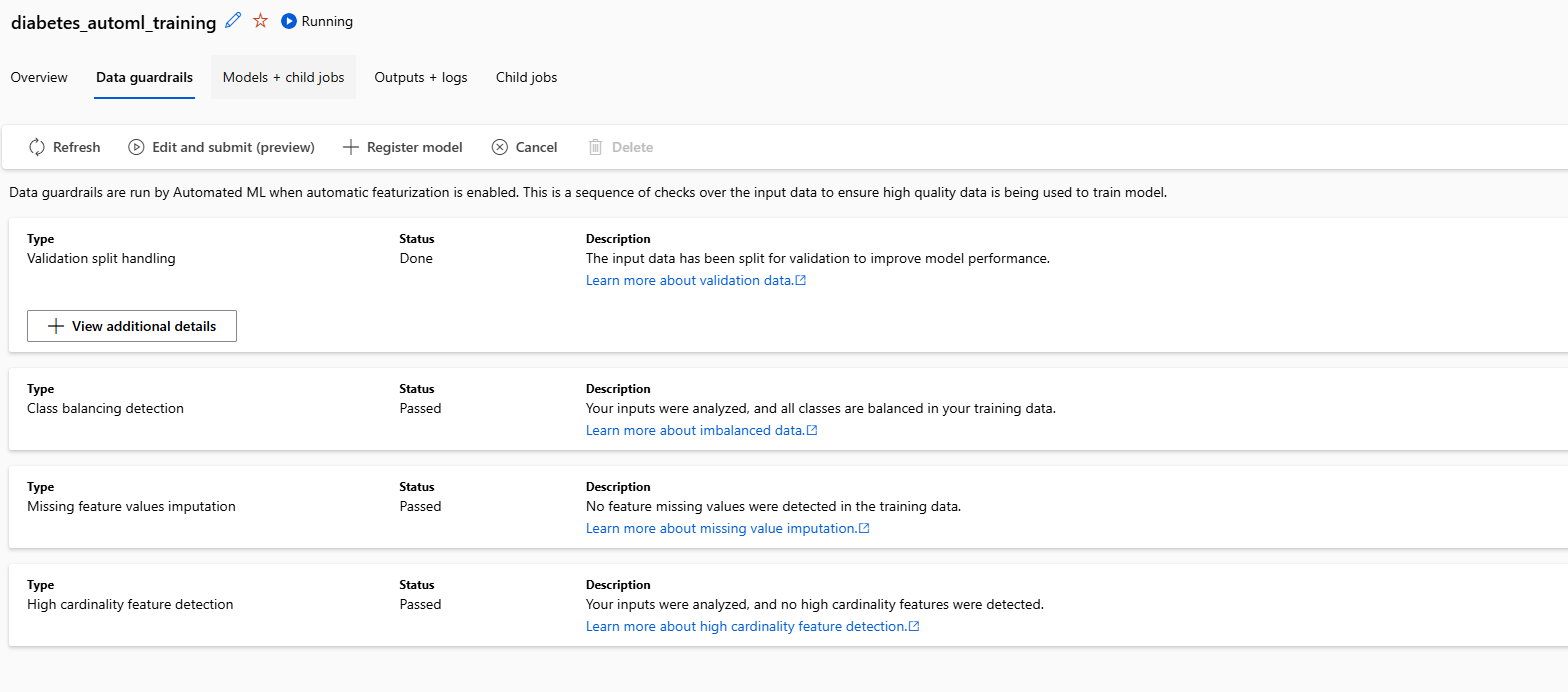
automl guardrails
after looking at the jobs, i deduced that automl seems to use pytorch (at least by default).
what's nice is that the "models + child jobs" section has all the
models that were trained.
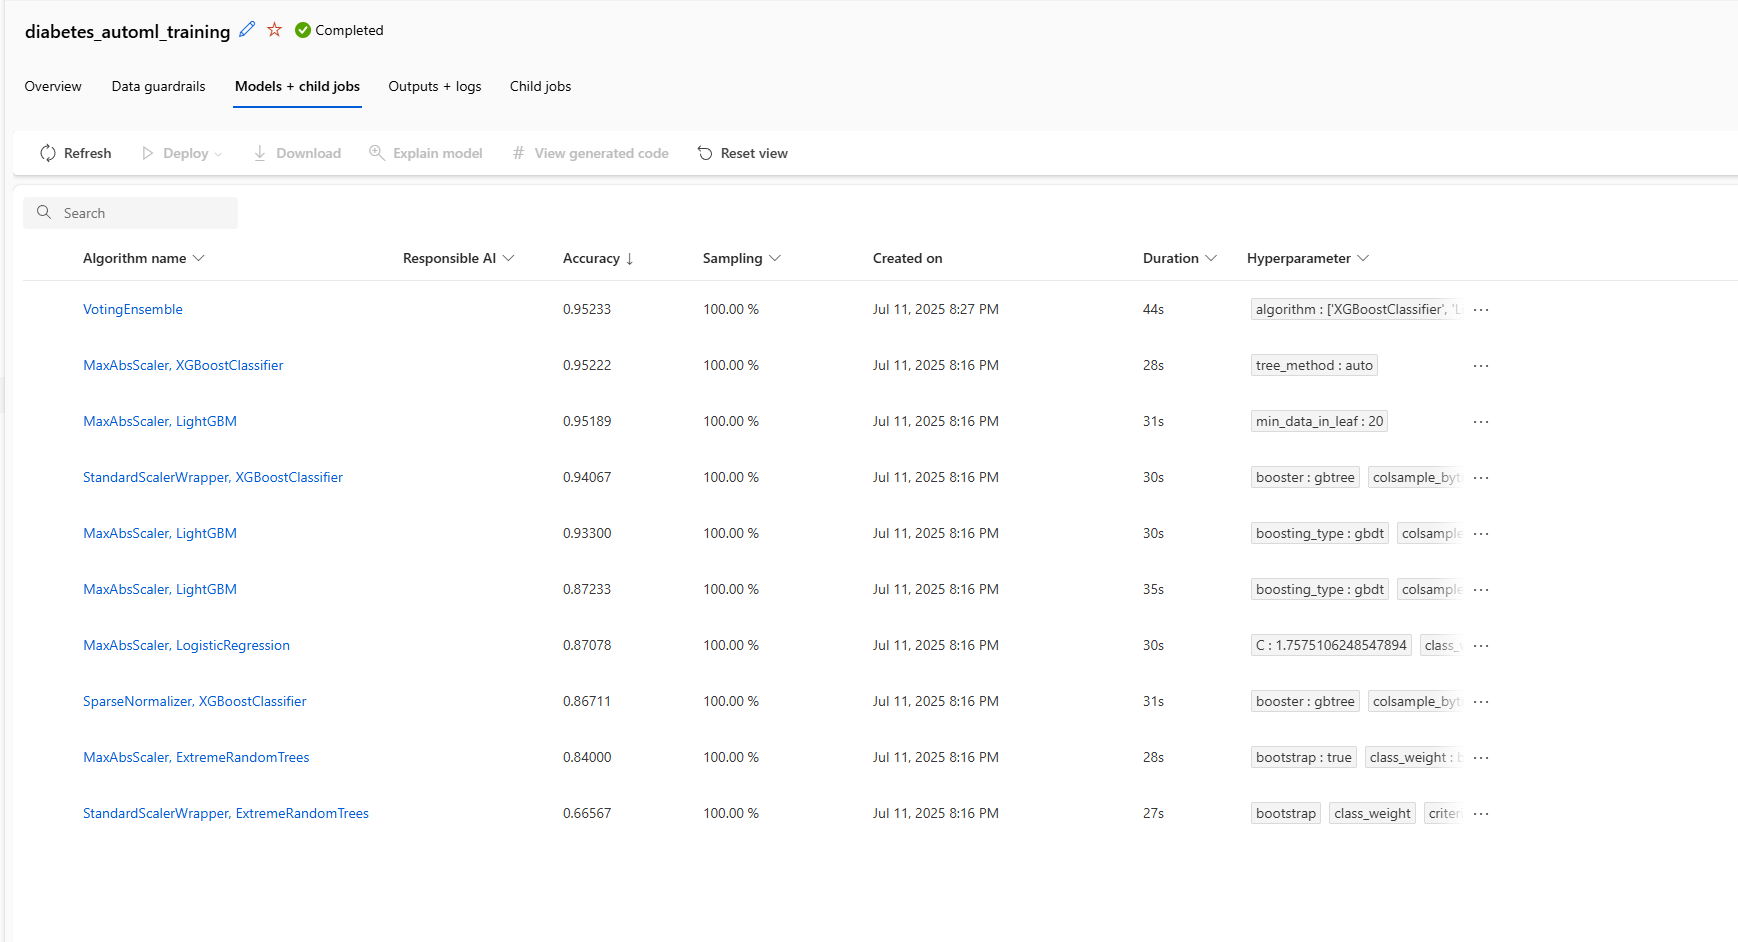
automl output models
after this, i can simply select a model, register is and deploy it to an endpoint. pretty sick!
conclusion
this seems to end the first module (1.1) of the self-learning course.
this seemed to cover the basics of the workspace and how to use it to train models.
looking at the next few models, it looks like they'll go more in depth with
connecting data (remote and local), more specific compute targets and how to use
more custom-made environments.
all in all, feeling pretty confident about this course so far.

feelin good
comments
no comments yet. be the first to comment!
please log in to post a comment.