MS-DP100 Self-Learning Course: Module 2
This is my overview/notes for the second module of the Microsoft DP-100 self-learning course.
Module 2! (source)
Module 1 - Classification Models
The module starts by recommending AutoML. LOL...
It goes over the the typical data preprocessing steps.
Firstly, you need your data asset. Then, you can specify it as an input to the task at hand.
The data also has to be scaled and normalized. These functions and their parameters/definitions may vary.
Apparently, AutoML does this automatically. Pretty cool.
There are a bunch of experiments that you can run with AutoML, including:
- Logistic Regression
- Light Gradient Boosting Machine (LGBM)
- Decision Trees
- Random Forest
- Naive Bayes
- Linear Support Vector Machine (SVM)
- XGBoost
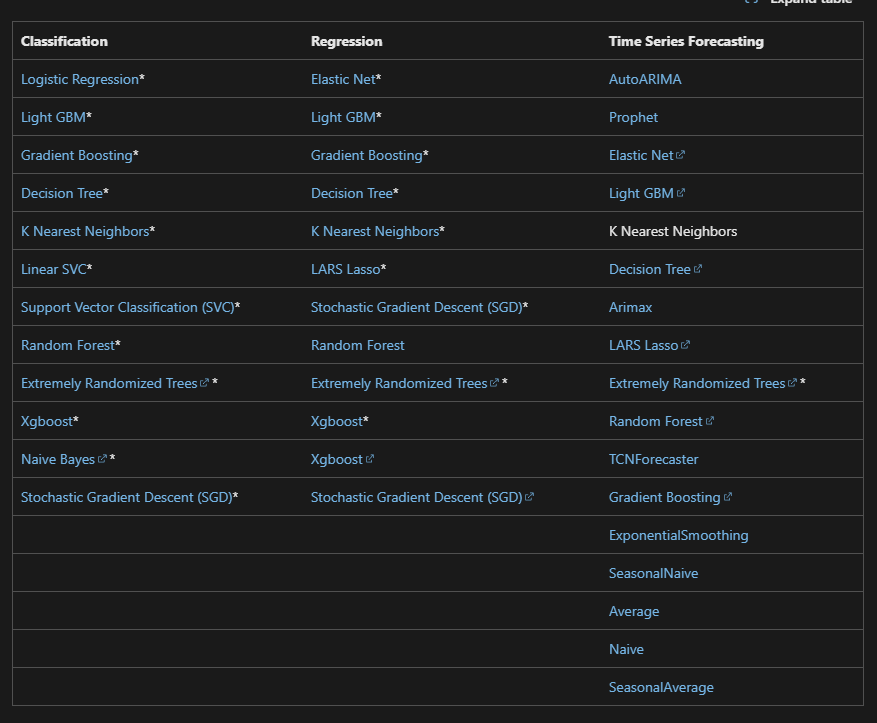
Yeah...quite a few. (source)
"By default, AutoML will randomly select from the full range of algorithms for the specified task."
It seems like you can block some algorithms if you know that they won't work for your data. That's definitely pretty
useful in terms of both efficiency and policy adherence.
Creating an AutoML experiment in the SDK makes sense!
The primary metric is the metric that will be optimized. In the case of the code above, it's accuracy.
However, some tasks may have different primary metrics (the most popular alternative I have seen is precision).
The full list of primary metrics can be found in the documentation.
Limits can also be set for the experiment.
timeout_minutes- the maximum time that the experiment can run for.trial_timeout_minutes- the maximum time that each trial can run for.max_trials- the maximum number of trials that can be run.enable_early_termination- whether to enable early termination of trials.
Trials can also be concurrently run, and the respective limit can be set with the max_concurrent_trials parameter.
Starting the monitoring the job is also easy in the Python SDK. Well, to be particular, you can't monitor the
job directly in the SDK, but you can reference a link to the job in the Azure portal.
What's cool about AutoML is that guardrails can be automatically applied to the job. Some examples of guardrails could be:
- Class balancing detection - AutoML can detect if the classes in the training data are imbalanced and apply techniques to balance them.
- Missing feature value detection - AutoML can detect if there are missing values in the features and apply techniques to handle them.
- High cardinality feature detection - AutoML can detect if there are features with high cardinality (i.e. a large number of unique values) and apply techniques to handle them.
AutoML can possibly fix these issues on their own (done status), or it can just detect them
if they are not fixable (alerted status).
All of the models that are trained in the AutoML job can be seen in the job's "Models" tab in the Azure portal.
These models will have their metrics in the overview. Pretty sick!
Module 2 - Track Model Training in Jupyter Notebooks
So...you know how I said that you can't monitor the AutoML job directly in the SDK?
Well, you can actually track the job in a Jupyter notebook. LOL I lied ahahaha
Using the mlflow library, you can set the tracking URI to the MLflow tracking server.
From there, you can track the job and metrics in the notebook.
Custom logging is also possible!
Logged metrics can all be found in the studio if done correctly.
Conclusion
All in all, this module was pretty useful. The first module was more of a review in terms of the math, but learning about AutoML and logging was pretty cool.

Fin. A picture of 34th Street at night :)